
Here are a few easy-to-use sunset photography tips to improve your images right now. With just a few pointers you will quickly end up with better, no, great landscape photographs, so you can say ‘landscape photography prints for sale’ or just plain ‘photos for sale’ and make a fortune doing what you love. Well, maybe not… 🙂 – but read on.
Get Ready To Go
Ok – you are ready? You have a spare hour or so up your sleeve and there are some (not too many) nice looking clouds to the west. The higher the clouds are, the better. You think it looks great for a sunset photo tonight? So, read on…
Do your Homework
I cannot state this enough. To ‘do’ landscape photography you need to understand the area you are in. To ‘do’ sunsets you need to know where (or rather at what angle) the sun will set. In the Berowra area where I live, on Sydney’s North Shore, I have several areas that are favourites. I split these areas into Winter, Summer, and ‘in-between’. Why? In summer the sun sets to the north-west, in summer to the south-west, and in-between in the general west. That makes a big difference in the photos you can take. Valleys that run north-west to south-east are great locations for sunset photographs in winter, however a waste of my (and your) effort in summer. Use an app, Photopills, Photographers Ephemeris etc to see where the sun sets on any given day.


This looks like ‘just another sunset’ but this image can only be taken around the shortest day of the year. The sun would be out of the frame to the left in summer.
Arrive Early
So, you have decided where to shoot. In the true spirit of ‘do as I say not do as I do’ as the keen reader knows, arrive around one hour before sunset. This will give you time to find a park spot, walk the extra few minutes you hadn’t planned for, find the cable you have lost, locate a memory card with some space left on it, and take an emergency phone call from your loved one to tell them where the dog’s towel is. You will also then be treated to late afternoon sunshine, can Smell the Roses, calm down, and can Nail The Spot where you will set up your tripod.
Then – important– once set up, wander away from your tripod and find a better location. This serves two purposes – Firstly you will find out if you really found the best spot first time. Secondly, after you have come back to your camera you will carefully re-evaluate your framing and composition. Double-check – is the sun setting exactly where you thought it would?

A lot of setting up here to find the best angle!

Hmmm – I was caught unawares this night, this was my third location option, so i was very late. As you can see it’s not going to be a best-seller!
Let the sun set
Take a lot of pictures – the sun will set from being just above the horizon to fully below in less than five minutes or so. Make each of those wonderful minutes count. Bracket exposures for foreground and sky with a view to blending later. I recommend bracketing in single stop exposures. If you take five frames at the time, you can always delete those that do not work upon review. If you only take two, but your histogram fails you, you have missed your best chance of getting the blended shot in post-processing.
And now for the ‘if’. Big ‘if’. Do you move around or stay still? Do you take one great composition in varying light or do you try to take two or three? I have no answer to that, but I know I have lost out big-time whilst moving around. Even if it takes only one minute to precisely level your tripod at the second location, you have lost that time. I recall with horror, moving to re-compose and needing to re-set my tripod legs to level, and one leg clamp stuck just as the sun set. I lost the money shot where the horizon bisects the setting sun. A rookie error.
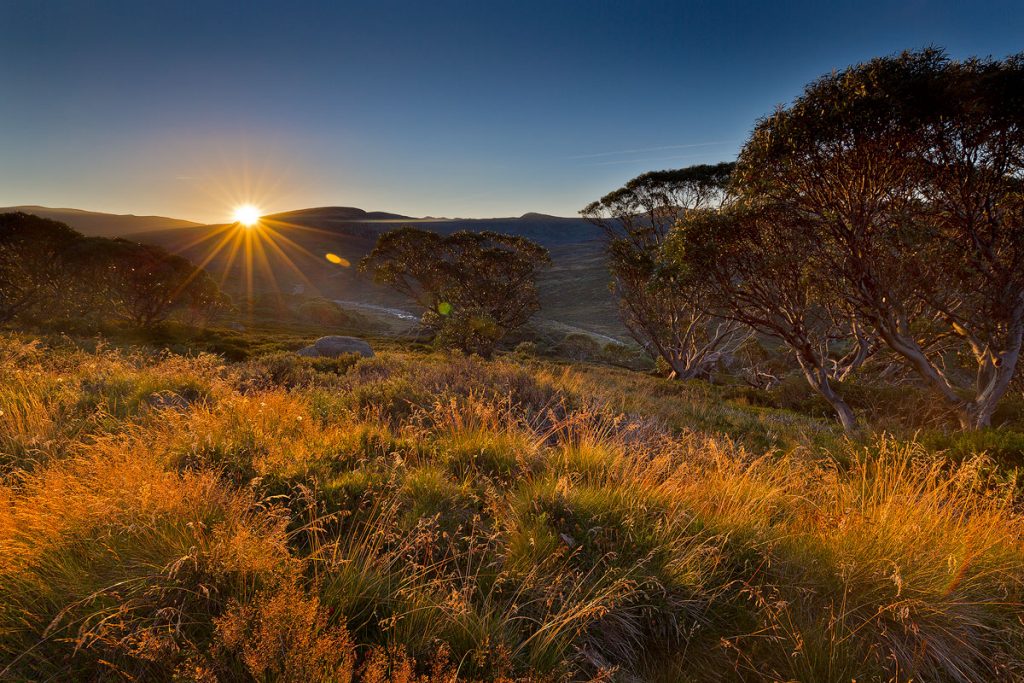
Charlotte Pass Sundown. I took a number of images as the sun set across 3-5 minutes. This was my pick of just the ‘right amount’ of sun.
Stay Late
The afterglow is where the Money Is if you call yourself a Landscape Photographer. The sky awash with bright coloured clouds in wonderful shapes. Happens every night of course. Or Not. You should stay, and not pack up the tripod, a good few minutes after you think ‘nothing more will happen’ – especially if there are clouds around. It’s kind of nice to relax anyway, and just ‘be’, sit down and take in the wonder of nature. You do nature photography, don’t you? So get in touch with it.
I have on several occasions taken the sunset image and then the sky has faded to dull grey. I considered nothing else would happen and packed my gear away. Then.. the merest hint of pink hits the underside of the clouds, followed by a full blown riot of colour. That’s what you are after! I have never had sunset –> grey –> colour –> grey -> colour though, maybe one day?
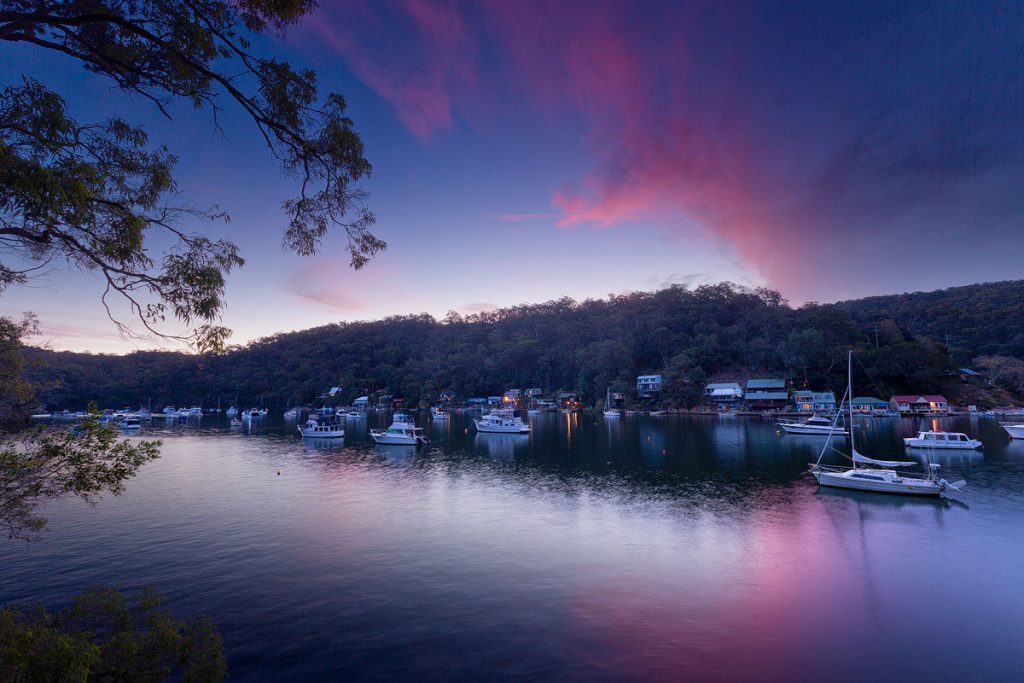
A classic afterglow – almost dark but with a little tweaking the last colours of the day can be made to sing in the final image.
Look All Around You
Sunsets are very contrasty by nature, and difficult to capture in a single image. What is much easier, and while generally a little gentler, is the ‘reverse sunset’ or afterglow which will happen to the skies in the East, and sometimes North and South. You will likely see a wash of mainly pink, and it truly is a beautiful gentle light to work with. If you are really lucky, in the moments of afterglow, you can shoot in two or more directions.
I will say that again – you are shooting the setting sun in the west. Turn around. Look east and see what the clouds are doing behind you.

Sunset Rush. This is a sunset over the sea on the East Coast, so indeed Look Behind You!!!
Let’s not forget…
This further reading will really help you.
For sunsets, usually I go for one third sky and two thirds land as per my Rule of Thirds article
Make sure you read about strong lines as well and giving your image depth in this article
And last but not least – you’ll be taking photos in The Golden Hour
Lastly
The last of my sunset photography tips. There is another kind of sunset photo. I hope this article has helped you not take such images. They are the type you see on Facebook from your friends on holiday. A dark line at the bottom of the image (the ground) and just the sky clouds and colour as ‘the image’. To see if you have taken a Great Sunset, imagine what the image would look like if there was no colour in the sky. Is it Strong? Does it follow the rules (or intentionally break them). If so, call yourself A Landscape Photographer, and put out the ‘Photos For Sale’ sign. Instant photographic art? – maybe, maybe not :-). If not, Happy Snapping!
More sunset photography tips to come – technically how to approach the contrast that is inherent in sunsets.
Thanks for reading this far
Andrew Barnes – in this case the Sunset Photographer


