Let’s talk about options for Panoramic Photography.
I remember it well. Actually I don’t because it was far too many years ago for my grey matter to recall anything that clearly, however…
This was when your camera in your hand determined the only ratio choice you had for your photos. The ratio was either square or kind-of rectangular. My very first camera took square photos (126 film), and when I moved on and got my next (‘big’ or 35mm) camera I took images that had a ratio of three to two. This corresponded roughly to the only widely-available paper size, 5 ½ by 3 ½ inch, which then became 6 by 4 inch, and eventually 7 by 5 inch. The keen mathematician will note than not all of those ratios are exactly three to two!
Fast-forward a little and along come pioneering photographers like Ken Duncan and Peter Lik. Ken Duncan used little-known formats made by niche camera-makers. He gave the photographic and postcard world in the early 1990s the Panorama to look at and consider. The images were about three to one ratio – very wide indeed. Welcome to the world of Panoramic Photography.
Since then, the world has changed and you have unlimited choice. Cropping is available to you everywhere, either in camera, or in post-production. As such there are a myriad of sizes to choose from. This may well end up confusing you, as the image maker. Sadly, but perhaps more tellingly, it will end up leaving the viewer of your image maybe a little less than satisfied.
Do you often find that when you take a beach scene – there is a nice blue horizon, golden expanse of sand, lovely blue sky, that the resulting photo has either (A) too much of that wonderful golden sand or (B) too much blue blue sky, and thus looks overall quite uninteresting as large areas of the image are unbalanced? This might be a good example of a time to take a horizontal panorama. If however, you are avoiding the local wildlife deep in the mountain ranges, with jagged peaks rising above you high into the sky, I suspect that you will find a nice image with a standard ratio camera. Portraits? Try standard. Outback dead-flat plains with the odd tree or well pump? I think they talk for themselves, try a pano.
One little ‘gotcha’ – panoramic photography, whether stitched or from your phone, should still have a standout or dominant feature to draw the viewer’s eye toward. This dominant feature should ideally be positioned according to the rule of thirds in your final frame (you did read my previous article, didn’t you?) It is sometimes difficult to start with the end in mind when taking a pano. This is because you cannot see the end product as you frame – or more correctly cannot frame – your image.
Interestingly enough, a little understood fact about panoramic photography is that in general you do not look at all of the image in one go – unless it is still on your phone as a tiny image. The eye will ‘scan’ from left to right, or alternatively focus on just one element.
Go on, try something different, use that pano feature on your phone or start to stitch images with your camera. Or, try a crop after you have taken a single image. Time to get into Panoramic Photography!
Thanks for reading this far
Andrew Barnes
The Berowra Photographer
The image is a good example of subject matter that doesn’t quite fill the frame. As a 3:2 ratio there is too much sky and too much water.
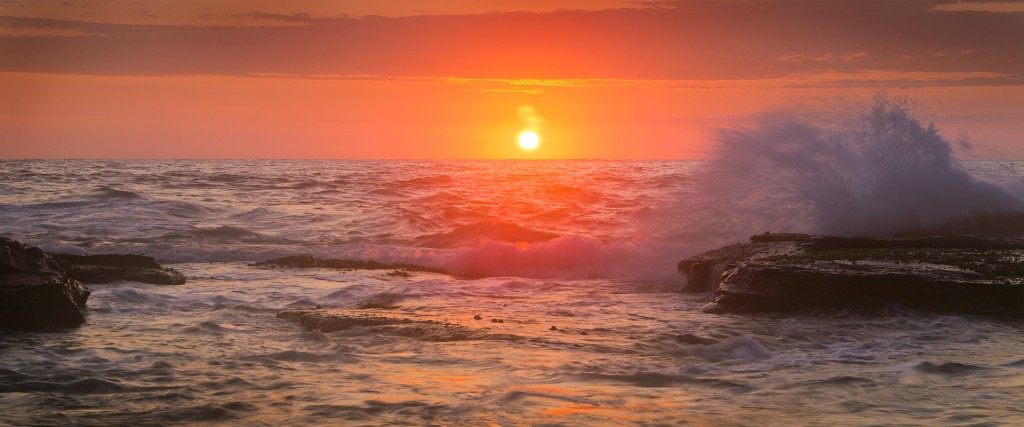
Here is the cropped 2.4 to 1 ratio version- much better!